

When I decided to start using handplanes, I was somewhat at a loss as where to start. I had very little experience using planes and,in hindsight, the experience I had was probably more of an obstacle. As I planned my first purchase, I had to decide whether to buy a new plane or fix up on old plane. I ended up buying an old plane: an old Stanley Bedrock Style 605 from the 1920’s off of E-bay for about 90 dollars. The plane was in rough shape, but all the parts were there and nothing was damaged. Using Garrett Hack’s Handplane Book and some tutorials from online, I set about restoring the plane. The first step was to take the plane apart and figure out try to figure out how it did it- I would later have to figure out how well each part was doing what it was doing.

Next issue was cleaning- or rather cleaning/rust stripping. This took probably the longest amount of time. This was partly due to inexperience and partly due to not having the ideal tools and supplies. These old planes have a tar-based protective paint called “japanning” and if it is in bad shape it really should be removed. This plane had about 50% of it’s japanning intact so I decided to strip it down and repaint it. This was the easy part. A couple applications of citrus-powered “safer” stripper and some wire brushing was enough to remove the majority of the old paint. Now the rust was something else and somewhat more unpleasant. I went to home depot and pep-boys and stocked up on a bunch of different acid rust removers. I tried them all out while wire brushing and had very mixed success. The process was long and made uncomfortable by donning all kinds of ungainly safety gear. The stuff stunk like cancer, and it really does burn/irritate the hell out of your skin should you catch an errant drop. I should note that this entire process now takes me no longer than 1 hour. The secret is an assortment of wire-wheel brushes used with my Foredom flex-shaft and the miracle rust remover that is Evapo-Rust. Accept no substitutes!
Anyway, after many hours the plane body was looking fairly good and I followed up by cleaning all the other parts of the plane in a similar manner. I am always amazed at how well cast iron can hold up under pretty nasty looking corrosion. I then masked out all of the parts that needed to be painted and applied several layers of appropriately thick semi-gloss automotive enamel.


Looking good so far. Now started the process of tuning or “fettling” the plane. This process addresses the functional components of the plane and how critical parts mate with each other and the surface of the wood. This is the part where I learned to get over my #2 tool-phobia: file on tool. The first order of business was truing up the mating surfaces of the frog (lilypad?): the places where the frog meets the plane body and the blade. These are probably the most critical surfaces (other than the sole) to well functioning plane. You want these surfaces to match perfectly to keep the blade from moving around causing chattering and headaches. This was accomplished with the help of a flat file and couple of small diamond flat hones used for sharpening knives. With the surfaces mating like rabbits, I moved on to the sole of the plane. This is the part of the plane where the tool literally meets the wood.


For the plane to function properly the sole should be as flat as possible or at least flat. Mine was not. Here I found the common problem with old planes where the section of metal in front and behind of the mouth (where the blade pops out) was hollow, probably worn from many years of use (this section works hard to compresses the fibers of the wood ahead of the blade). Also the sides of the plane were not square either from manufacturing or more likely from having been dropped. Here I had construct a lapping plate from some wet-dry sand paper spray-adhesive’d large piece of float glass. Here’s where shit gets zen. Back and forth, back and forth, flip around, repeat x1000000. I for hours, I pushed and pulled the fully assembled plane over the abrasive and watched my sharpie-layout lines fade away. The sides got a similar treatment, applying pressure to the high sides and regularly checking for square.
 One side was squared successfully with abrasion alone, the other took some… coaxing... coaxing with a hammer and a wedge. Hammering on 100 year old cast iron: Tool-phobia #2 conquered! Banging helped a lot, but I stopped short with thoughts of cracking cast-iron haunting my thoughts. The rest I would sand.
 The last step was to give my dog some teeth. Instead of using the old blade I purchased a new thicker blade from Ron Hock which utilizes durable A2 steel and a modern style chipbreaker. This is where I discovered that my pup was a mutt. The screw that held on the lever cap to short having only a couple of threads griping the frog. Initially thought that it might be the thicker blade, or a short screw, but doing a little internetsing found that it the lever cap was not correct and may not have even been even a Stanley. A little more internetsing and I had a proper cap on the way via the E-bay. Plane complete!
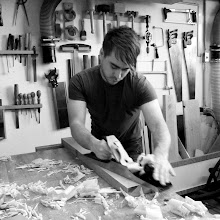
How does the plane work?
Beautifully- it remains one of my favorite planes and I use it with nearly every project. Of course, it helps that I have it set up as a fore-jack plane. This is a very course plane used to remove lots of material very aggressively and can be plenty “off”. Don’t get me wrong, initially I set this plane up to smooth and it did take some of those lacey shavings that make you grin like an idiot. Does this plane compare to a modern plane?
No not really. Modern planes are made using materials and precision that are unimaginable by 1920 standards and really are superior. However, for the task that I use this plane for a new “premium” plane would be complete hyperbole. For my first plane I am glad that I had to work on/for this plane. I would argue that I learned far more about planes than if I had bought a plane and it was ready to take flawless whisper-thin shavings right out of the box. Granted, when I finally got around to acquiring my first new-new plane I may have had to change my pants.

Springer final thought: I love old iron.
Since my 605 have restored several dozen planes and all sorts of other old tools (including a workbench). They may not be as slick or robust as their modern counterparts (if there are equivalents), but they’ve got soul in spades and that’s never a bad thing. There’s also something very much fulfilling about finding an old tool and putting it back to work. Perhaps may just be foolish nostalgia for the methods of a bygone era, but I feel that working with these tools and in this manner places me in continuity with a tradition of craft. The relationship is less one of ownership and is more one of stewardship. I keep the tools and the tools keep me. (Note: Velveeta-Alert!)
I think if you are looking to get into planes you could do a lot worse than getting a halfway decent prewar Stanley, buy a book (Schwarz or Hack), and fettle the crap out of it. Of course, before you even think about getting a plane, new or old, bug someone who knows what they are talking about and have them teach you sharpening. Unless you like shiny tool-shaped paper-weights (who doesn’t?).

BTW: My blog titles are starting to sound like kung-fu movie titles. Next post: Vanishing Point: Revenge of the Razor’s Edge. Not really… well maybe.
No comments:
Post a Comment